OpenFXが公開しているプラグインのサンプルをビルドする為に前回はサポートライブラリのビルドをしました。
今回はやっと本題のサンプルプラグインをビルドしてDaVinchi Resolveにインストールしてみたいと思います。
開発環境
OpenFX 1.4
Windows 11
CMake 3.22 (以上)
Visual Studio 2022 (Community Edition)
- C++ v143 build tools (x86 & x64)
- MSBuild 17
CUDA Toolkit 11.8
プロジェクトのフォルダ構成
前回と同様にOpenFXのプロジェクトからincludeフォルダ,Supportのincludeフォルダをコピー。
追加でExamplesフォルダ内のbasic.cpp(Examples/Basic/basic.cpp)とofxUtilities.H(Examples/include/ofxUtilities.H)の2つをコピーして下記のようなフォルダ構成にします。
simple ofx plugin/
├ openfx/
├ include/
├ Support/
├ OfxSupport.lib (前回生成したもの)
└ include/
├ basic.cpp
└ ofxUtilities.H
OpenFXの1.4バージョンのプロジェクトは下記コマンドでcloneします。
git clone --branch OFX_Release_1_4_TAG https://github.com/AcademySoftwareFoundation/openfx.git
CMakePresets.jsonの作成
プロジェクトのルートに置きます。
目的は主に2つで
- windows 64bit以外のOSを弾く
- ビルドフォルダを作る(out-of-source build)
{
  "version": 3,
  "cmakeMinimumRequired": {
    "major": 3,
    "minor": 22,
    "patch": 0
  },
  "configurePresets": [
    {
      "name": "macos",
      "description": "Default macOS build",
      "hidden": false,
      "generator": "Xcode",
      "binaryDir": "${sourceDir}/build/build_macos",
      "cacheVariables": {
        "OFX_ARCH_NAME": "MacOS",
        "CMAKE_BUILD_TYPE": "Debug"
      }
    },
    {
      "name": "windows-x64",
      "description": "Default Windows build (x64)",
      "hidden": false,
      "generator": "Visual Studio 17 2022",
      "binaryDir": "${sourceDir}/build/build_x64",
      "cacheVariables": {
        "OFX_ARCH_NAME": "Win64",
        "CMAKE_BUILD_TYPE": "Debug"
      }
    }
  ]
}
CMakeLists.txtの作成
OpenFXのapiとサポートライブラリの設定をします。
今回は省きましたがビルド後にSimpleOFXPlugin.dllの拡張子を.ofxに修正します。
cmake_minimum_required(VERSION 3.22...3.25)

# project name
project(SimpleOFXPlugin CXX)

# set path
set(OPENFX_DIR ${CMAKE_CURRENT_SOURCE_DIR}/openfx)
set(OPENFX_API_HEADER_DIR ${OPENFX_DIR}/include)
set(OFX_SUPPORT_HEADER_DIR ${OPENFX_DIR}/Support/include)
set(OFX_SUPPORT_LIBRARY_DIR ${OPENFX_DIR}/Support/OfxSupport.lib)

# target Definition
add_library(SimpleOFXPlugin SHARED basic.cpp)

# compile, include, link
target_compile_features(SimpleOFXPlugin PRIVATE cxx_std_14)

include_directories(${OPENFX_API_HEADER_DIR}
                        ${CMAKE_CURRENT_SOURCE_DIR}
                        ${OFX_SUPPORT_HEADER_DIR})

target_link_libraries(SimpleOFXPlugin PRIVATE ${OFX_SUPPORT_LIBRARY_DIR})

set(CMAKE_INSTALL_PREFIX ${CMAKE_CURRENT_SOURCE_DIR}/install)

# OpenFX plugin folder setting
install(TARGETS SimpleOFXPlugin
        RUNTIME DESTINATION SimpleOFXPlugin.ofx.bundle/Contents/${OFX_ARCH_NAME}
        LIBRARY DESTINATION SimpleOFXPlugin.ofx.bundle/Contents/${OFX_ARCH_NAME})

# Info.plistもコピーする場合
#install(FILES Info.plist
#        DESTINATION SimpleOFXPlugin.ofx.bundle/Contents)

# Change  Prefix .dll -> .ofx
作成後のプロジェクトフォルダ構成は下記。
simple ofx plugin/
├ openfx/
├ include/
├ Support/
├ OfxSupport.lib (前回生成したもの)
└ include/
├ CMakeLists.txt (今回作成)
├ CMakePresets.json (今回作成)
├ basic.cpp
└ ofxUtilities.H
basic.cppの修正
プロジェクトのフォルダ構成を公式リポジトリから変更したので、basic.cppの59行目を修正します。
line59 : include "../include/ofxUtilities.H" // example support utils

↓

line59 : include "ofxUtilities.H" // example support utils
ビルド
cmakeコマンドで生成されたソリューションファイルを開きいてSimpleOFXPluginをビルドします。
cmake --preset windows-x64場所はbuild/build_x64/SimpleOFXPlugin.sln
SimpleOFXPluginでビルドを実行した後に、INSTALLプロジェクトでビルドするとCMaleListsで設定したフォルダ(install\SimpleOFXPlugin.ofx.bundle\Contents\Win64)にdllが入った状態で生成されます。
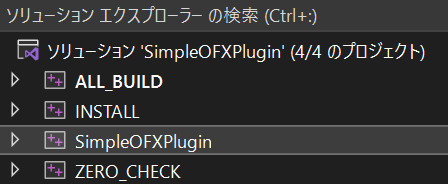
最後にSimpleOFXPlugin.dllをSimpleOFXPlugin.ofxに変更して完成です。
蛇足
Support/Plugins内のbasic.cppを使う場合はofxsProcessing.Hを参照するのでファイルを追加してください。
ofxsProcessing.Hの137~140行目のstd::min/std::maxの部分でビルドエラーが出る場合はwindows.hでmin/maxマクロが登録されている事が原因である場合があります。
その場合はカッコで囲んでください。
std::max(~) -> (std::max)(~)
std::min(~) -> (std::min)(~)
DaVinchiResolveでプラグインを読み込ませる
OpenFXのプラグインは”OFX_PLUGIN_PATH”という環境変数で定義されたパス、又は「C:\Program Files\Common Files\OFX\Plugins」内に保存すると対応しているエディタが検索してくれるのでそこへ保存します。
今回は「C:\Program Files\Common Files\OFX\Plugins」以下にSimpleOFXPlugin.ofx.bundleフォルダをコピーしました。
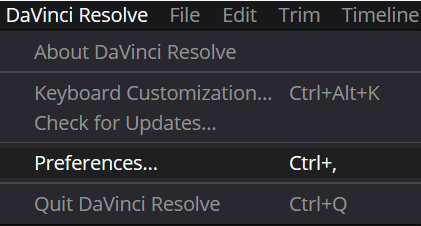
DaVinchiResolveを立ち上げてDaVinchi Resolve->Preferencesをクリック
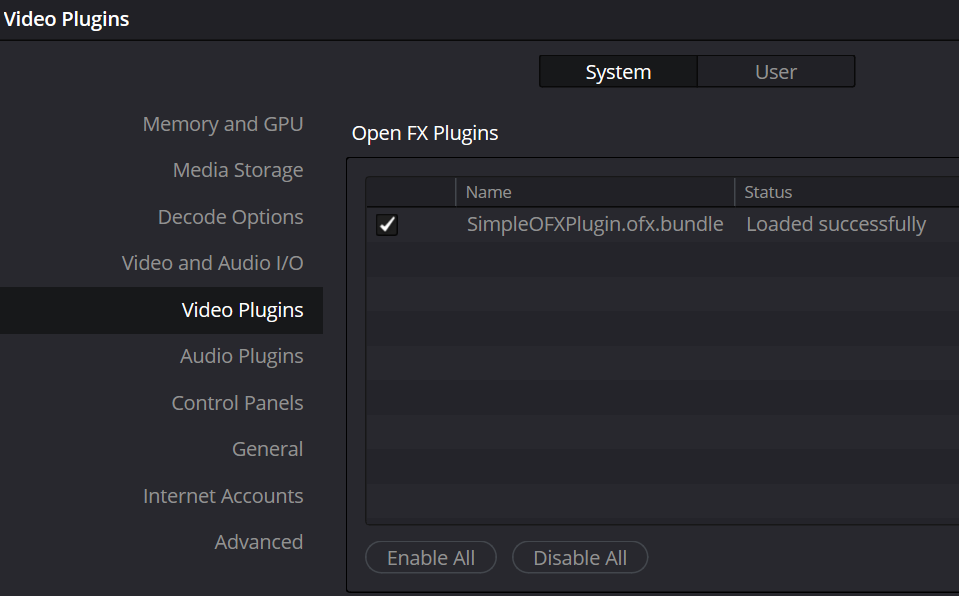
Video Pluginsに作成したpluginの項目があるので、チェックを入れる
Effects内にOFX Exampleが追加されています。
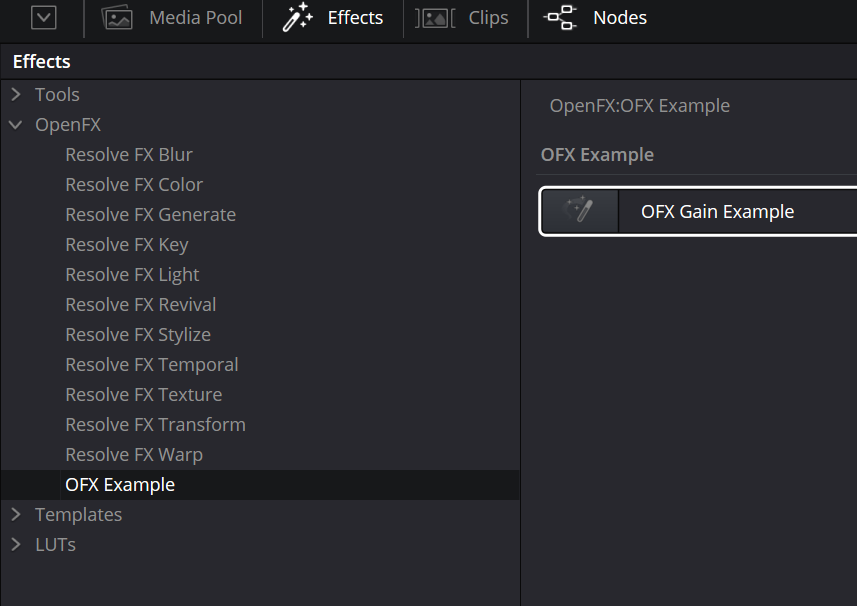
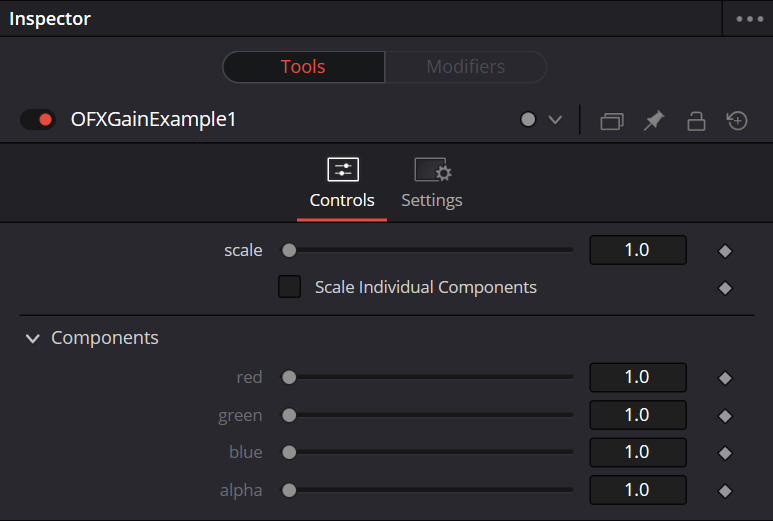
サンプルのインスペクターは下図のような感じです。
以上でOpenFXプラグインのサンプルをDaVinchi Resolveに認識させる作業の完了です。


